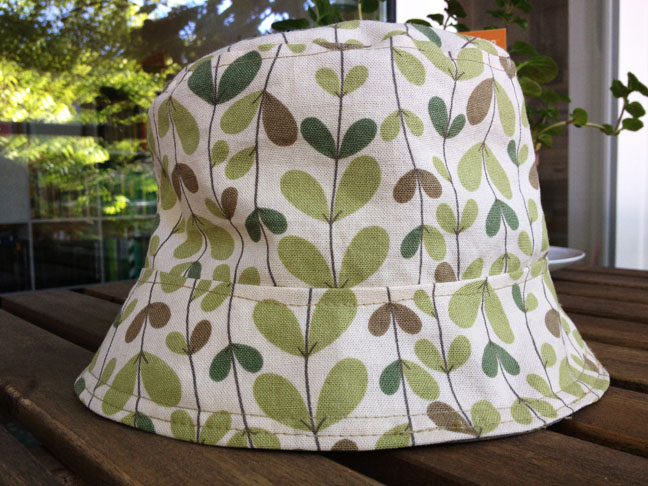
This month I tried out a couple of free patterns for children's summer hats and these are my pattern notes. Links and details are below. They are both available online. Making a summer hat is surprisingly easy, these each took about 3 hours. For a fast sewer, probably more like 1 and 1/2 to 2 hours.
Materials for both hats
— about 1/3 yard of medium-weight cotton or linen fabric for one side
— about 1/3 yard of a contrasting fabric
— sewing machine, thread, etc.
— 1/2 a yard medium weight sew-in interfacing
Reversible Bucket Hat by Oliver + S
Available from Oliver + S
Unisex
Sizes available: 6–12 month, 12–24 month, 3–5 years and 6–8 years
Time: for me this was 4 hours from beginning to end. I am not a very fast sewer.
I made this hat first in the 3–5 year size using a lightweight cotton canvas by Daiwabo for one side — you can find it here — and a plain cotton poplin on the reverse. I didn't worry too much about making it truly reversible and let the crown of the interior be a little bumpy.
The sizing is good, running toward the small. I'm not sure if this will still fit my son when he's 5, but it fits his 4 year-old head pretty well.
Good features: the pattern has very comprehensive directions with clear diagrams, good for a confident beginner. It is in inches and is in English.
Baby/Boy's hat from By Miekke
Available from Miekke Patroon : direct link to pattern PDF and instructions at her blog
Boys
Sizes available: my approximations are "Baby" 6–12 month (45 cm, 17 and 3/4 inches), "Dreumes" 12–24 month (48 cm, 18 and 7/8 inches, "Peuter" 3–5 years (51 cm, 20 inches) and "Kleuter" 6–8 years (20 and 7/8 inches). Each size includes a 1 cm seam allowance. Definitely measure your child's head before selecting one of these.
Time: 2–3 hours
I made this in the "Peuter" size. Which was a good fit for 3–5. My son picked this leaf pattern out from some scraps of lightweight canvas I had, I think it's by Kokka.
So, this pattern is in Dutch. I don't speak Dutch. I copied and pasted her blog post into google translate and it was quite straightforward to follow the directions. I don't want to post her instructions on our blog, however, if you need help, please email me at windyandfriends at gmail dot com.
Good features: This is actually a much simpler pattern than the Oliver + S pattern, however, it is presented in a more informal way. For boys I do love the straight brim of this design.
Modifications: I used interfacing on the brim, but the pattern doesn't call for it — I just wanted a stiff brim.
When you are sewing the sections together, one of the pieces will be a tiny bit bigger than the other. The Dutch instructions seem to suggest folding in the difference as pleats. I preferred to clip the smaller piece inside the seam allowance until the sizes matched. These are small, straight cuts, not like the v-shaped notches you clip out when sewing a curve. Clip whichever piece is tighter, the cuts will stretch it out so it matches the larger piece. I also found it easiest to spend 10 minutes loosely tacking or basting the crown in place by hand, clipping and then sewing.


