One of my favourite things is my kite. I made it out of paper, string and wooden sticks. Sometimes it crashes and once it even blew away. But if I wait for a light breeze, it flies high up in the air
(These directions were originally printed inside the dust jacket of our first book, Windy. Instead of paper, you can also use a thin plastic or an lightweight unrippable paper like Yupo. Have fun! — Robin & Judith)
Windy’s Kite
MATERIALS
2 softwood dowels, 3/16” wide (or thin sticks) lengths 32” (spine) and 28” (spar)
Newspaper or kraft paper
10lb kite line OR kitchen string
10 small strips of cloth or small squares of paper
Ruler, pencil, white glue,
utility/X-acto knife, tape
GLOSSARY
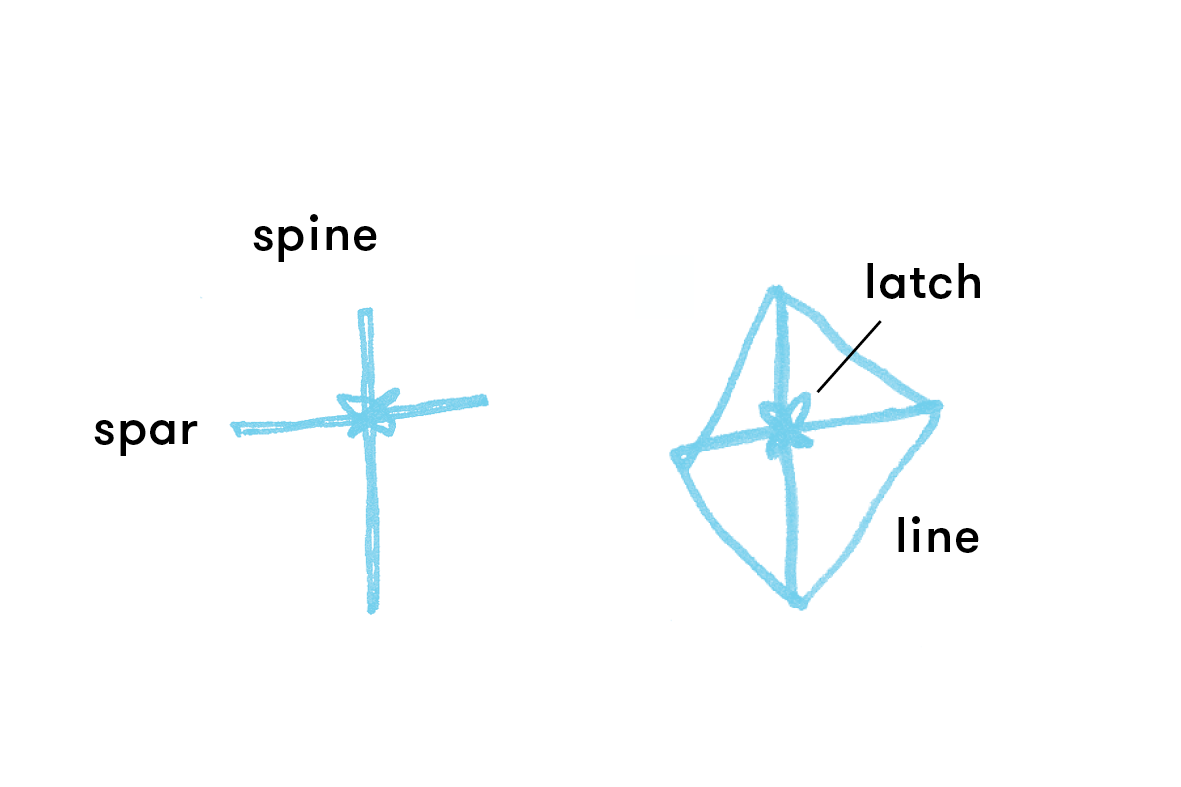
SPINE and SPAR see diagram above
LATCHING winding string around the central cross of the frame in a figure 8 motion
MAKING THE FRAME
A grown-up will need to help you with the cutting. Note to grown-ups: Cut away from yourself when cutting wood.
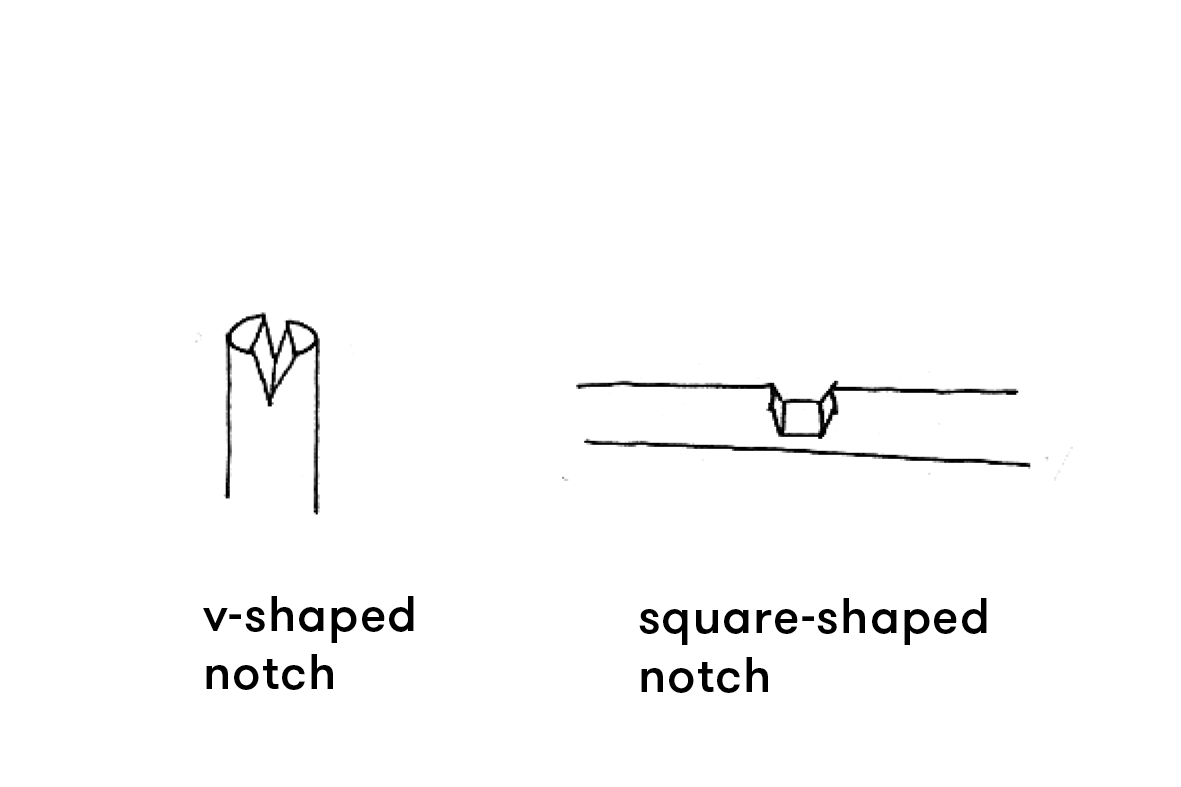
1. Make a V-shaped notch at each end of the spine and spar.
2. Make a square shaped notch 10” from the top of the spine and at the midpoint of the spine.
3. Match up the spine and spar at the notches and glue them together. When they have dried, latch them together with line or strong thread and knot tightly.
4. Run line or thread around the 4 points of the frame, passing through the V-shaped notches as illustrated below. Then proceed to your cover.
COVER
1. Lay out your paper and place the kite frame on top.
2. Carefully trace the shape of the frame onto the paper.
3. Cut this shape out LEAVING a 1” hem all around your tracing.
ASSEMBLY
1. Place the frame in the centre of the cover.
2. Fold the hem over the line/thread of the frame and glue it down
3. Punch 4 small holes through the cover where indicated on the diagram, quite close to the frame. We stuck down small pieces of masking tape to the cover before punching the holes, for added reinforcement.
4. Tie the end of a long (about 18-20’) piece of line or string around the latch, passing through two holes on either side. Knot tightly.
*Note: The string should be coming out of the covered side (the opposite side of the kite as the drawing above shows) when this is done.
THE TAIL
*the tail is important for flying as it provides resistance or “drag” when flying
1. Cut a piece of line or string 10’ long plus 3”, for tying.
2. Tie one end to the bottom of the kite, passing through the 2 holes at the bottom and over the spine. Knot.
3. Add a bow at 12” intervals down the string using one of 2 methods:
a. knot small strips of cloth directly to the tail
b. Fold up small squares of paper into accordions. Squeeze them in the middle to look like bow-ties. Latch them onto the tail with thread or line.
FLYING
A light breeze is best for a paper kite. A perfect breeze will cause tree leaves to rustle, but not be strong enough to cause twigs and leaves on the ground to dance. Go to a large clear area (like a park or field) with a friend. Make sure there are no power lines, trees or cars nearby.
Ask your friend to hold the kite, so that the covered side is facing against the wind.
You stand in front of your friend, a short distance away.
Pull the string taught and wrap the extra length around your hand.
When you’re ready, your friend will throw up the kite. Give it a good tug.
As the kite goes up, uncoil some of the string around your hand.
Run in the opposite direction of the wind.
*If your kite seems to have trouble staying up, try removing a few of the bows from the tail.


